Learning how to use the snipping tool on Chromebook is a valuable skill for capturing screenshots and enhancing productivity. Whether you're a student, professional, or casual user, this guide will walk you through everything you need to know about using the snipping tool effectively on your Chromebook.
Chromebooks have become increasingly popular due to their affordability, ease of use, and cloud integration. However, many users are unaware of the built-in tools that can enhance their experience, such as the snipping tool. This versatile tool allows you to capture screenshots, annotate them, and save them effortlessly.
In this article, we'll explore how to use the snipping tool on Chromebook step by step, including tips and tricks to make the most of its features. By the end of this guide, you'll be able to confidently capture and edit screenshots like a pro.
Read also:Unraveling The Tom And Gisele Divorce A Deep Dive Into Their Journey
Table of Contents
- Introduction to Snipping Tool on Chromebook
- How to Access the Snipping Tool on Chromebook
- Types of Snapshots You Can Take
- How to Use the Snipping Tool Effectively
- Saving and Sharing Your Captures
- Customizing the Snipping Tool Settings
- Alternative Tools for Screenshot on Chromebook
- Tips and Tricks for Better Screenshots
- Common Issues and Troubleshooting
- Conclusion and Next Steps
Introduction to Snipping Tool on Chromebook
Chromebooks come equipped with a variety of built-in tools designed to improve user experience. One such tool is the snipping tool, which allows users to capture screenshots in different formats. This feature is particularly useful for students, professionals, and content creators who need to document their work or share visual information.
The snipping tool on Chromebook offers several advantages over traditional screenshot methods. It provides options for capturing full-screen, partial screen, or specific windows, making it versatile for various needs. Additionally, the tool allows users to annotate and edit their screenshots directly, saving time and effort.
Why Use the Snipping Tool?
Using the snipping tool on Chromebook can streamline your workflow by allowing you to capture and edit screenshots quickly. Whether you're creating tutorials, documenting issues, or sharing information, this tool is an essential part of your digital toolkit.
How to Access the Snipping Tool on Chromebook
Accessing the snipping tool on Chromebook is straightforward. Follow these steps to get started:
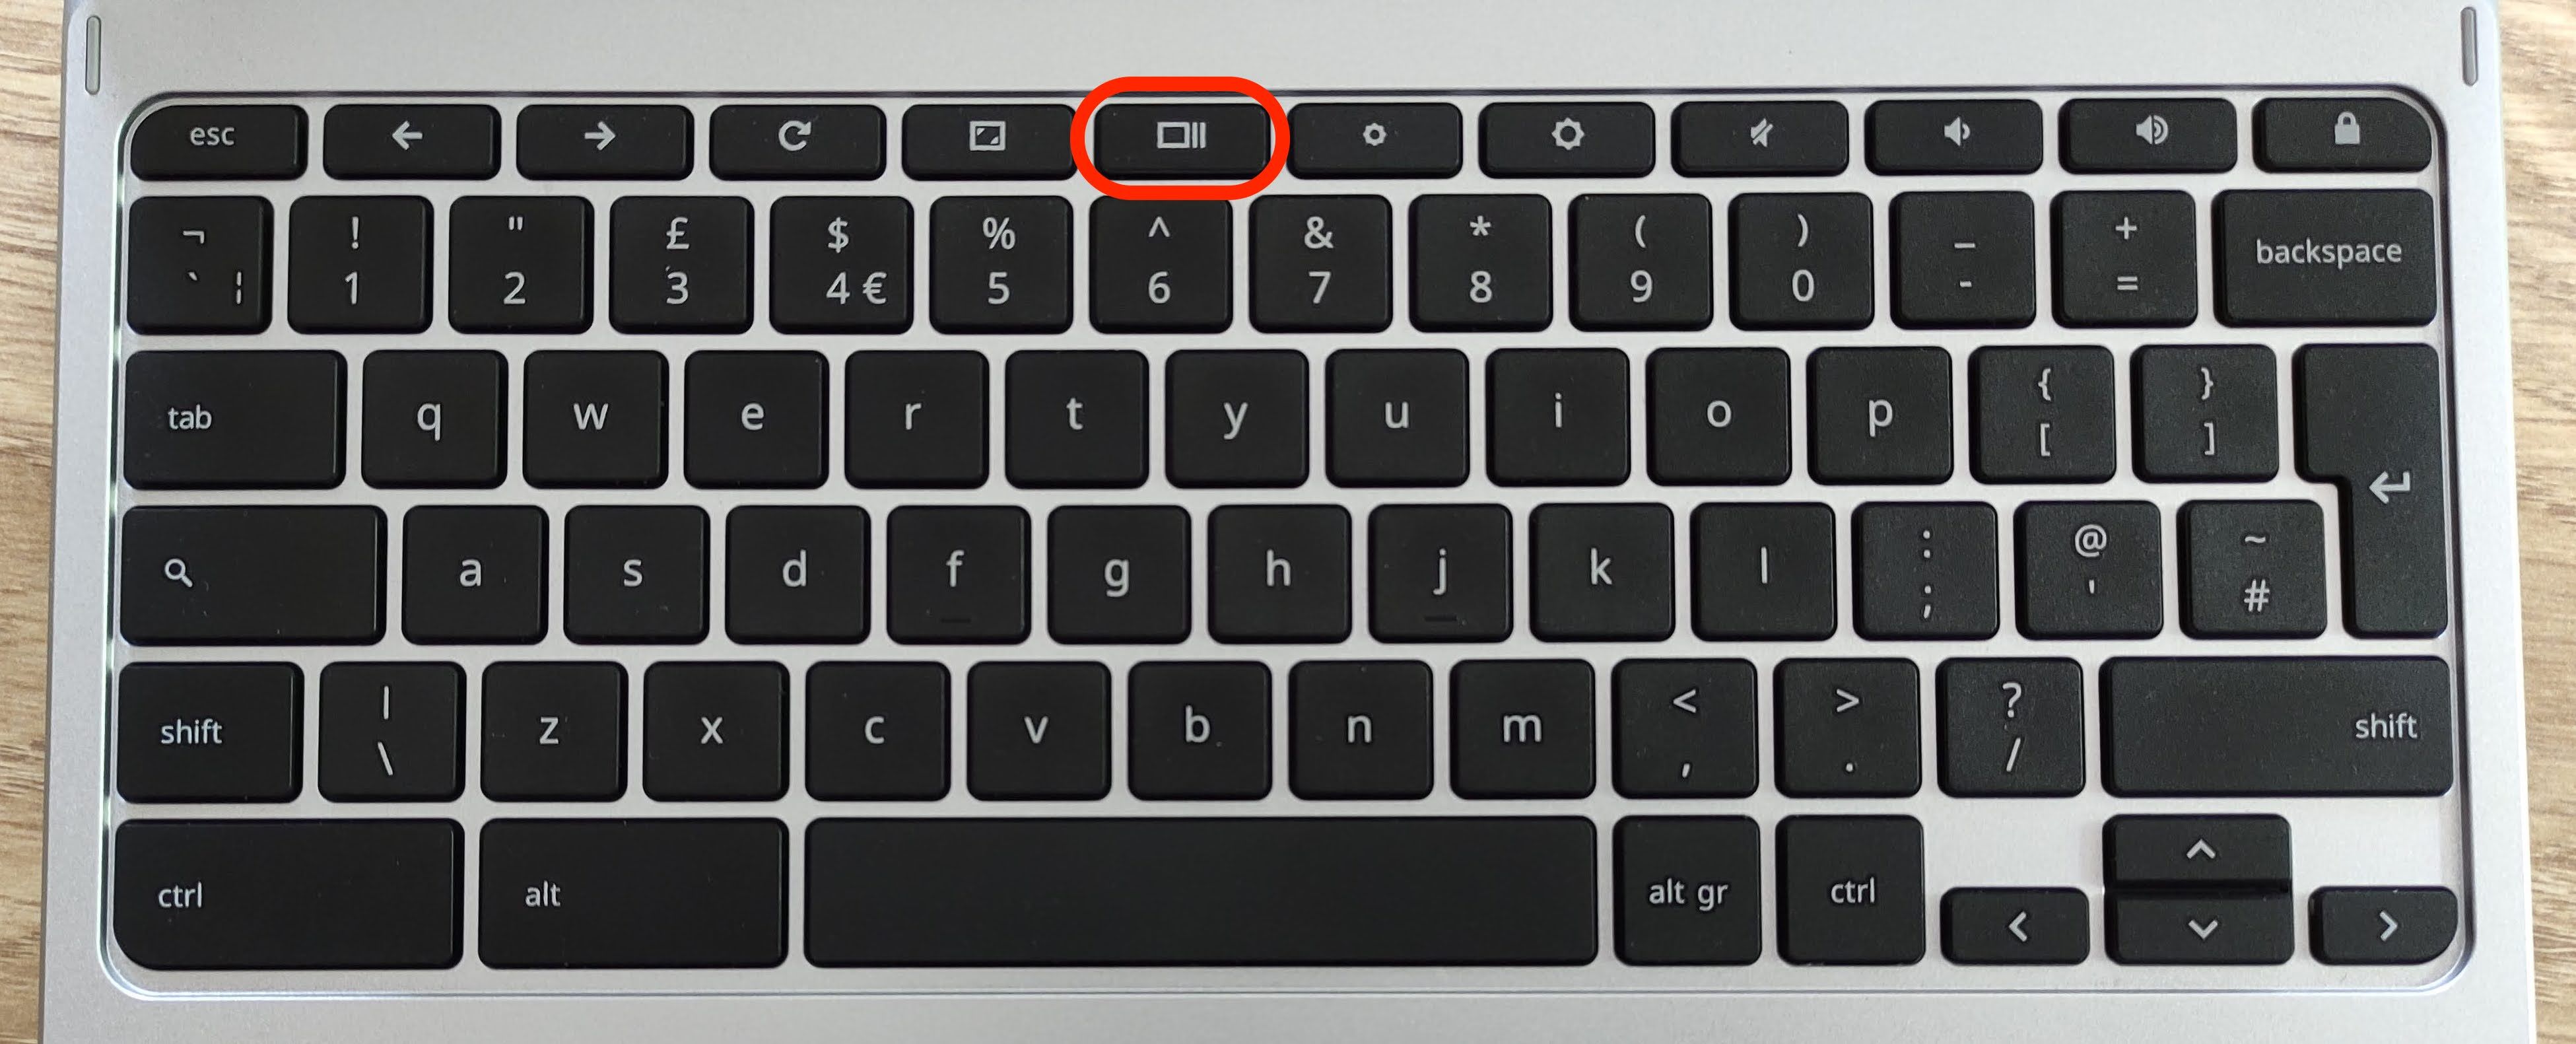
- Press the Search key (magnifying glass icon) on your Chromebook keyboard.
- Type "screenshot" in the search bar.
- Select "Take a Screenshot" from the search results.
Alternatively, you can use keyboard shortcuts to access the snipping tool:
- Press Ctrl + F5 to capture the entire screen.
- Press Ctrl + Shift + F5 to capture a specific window or region.
Understanding Keyboard Shortcuts
Keyboard shortcuts are a quick way to access the snipping tool on Chromebook. By memorizing these shortcuts, you can save time and increase your productivity when capturing screenshots.
Read also:Unraveling The Mystery When Did Jodi Arias Kill Travis
Types of Snapshots You Can Take
The snipping tool on Chromebook allows you to capture screenshots in several ways:
Full-Screen Capture
To capture the entire screen, simply press Ctrl + F5. This method is ideal for saving a complete view of your desktop or application.
Partial Screen Capture
If you only need a portion of the screen, use Ctrl + Shift + F5 to select a specific area. This is useful for highlighting important details or isolating specific elements.
Window Capture
For capturing a single window, click on the "Take a Screenshot" option and select the desired window. This method ensures that only the relevant content is captured.
How to Use the Snipping Tool Effectively
Once you've accessed the snipping tool, here's how to use it effectively:
- Select the type of capture you want (full-screen, partial screen, or window).
- Use the on-screen tools to annotate your screenshot with shapes, lines, or text.
- Save your edited screenshot to your desired location.
By taking advantage of the snipping tool's editing features, you can enhance your screenshots and make them more informative or visually appealing.
Editing Features
The snipping tool offers basic editing capabilities, such as:
- Adding text
- Drawing lines or shapes
- Highlighting important areas
These features are perfect for creating professional-looking screenshots without needing additional software.
Saving and Sharing Your Captures
After capturing and editing your screenshot, you'll want to save and share it. By default, screenshots are saved in the "Downloads" folder on your Chromebook. You can also choose to save them in other locations, such as Google Drive or external storage.
To share your screenshot, you can:
- Attach it to an email
- Upload it to a cloud storage service
- Share it via social media platforms
Optimizing File Size
When saving your screenshots, consider optimizing the file size for faster sharing and easier storage. Most Chromebooks automatically save screenshots in PNG format, but you can convert them to other formats if needed.
Customizing the Snipping Tool Settings
You can customize the snipping tool settings to suit your preferences. To do this:
- Open the Chromebook settings menu.
- Go to "Device" and select "Keyboard shortcuts."
- Modify the shortcuts for taking screenshots as needed.
Customizing the settings allows you to streamline your workflow and make the snipping tool even more efficient.
Keyboard Shortcut Customization
Adjusting keyboard shortcuts can make it easier to access the snipping tool quickly. Experiment with different combinations to find what works best for you.
Alternative Tools for Screenshot on Chromebook
While the built-in snipping tool is powerful, there are alternative tools you can use for capturing screenshots on Chromebook:
- Google Chrome Extensions: Extensions like Lightshot or Nimbus Screenshot offer advanced features for screenshot capture and editing.
- Third-Party Apps: Apps like Greenshot or Snagit provide additional functionality for users who need more advanced tools.
These alternatives can be useful if you require more advanced features than the built-in snipping tool offers.
Comparing Tools
When choosing a screenshot tool, consider factors such as ease of use, editing capabilities, and file format support. The built-in snipping tool is ideal for basic needs, while third-party tools may be better suited for advanced users.
Tips and Tricks for Better Screenshots
Here are some tips and tricks to help you take better screenshots on your Chromebook:
- Use the snipping tool's delay feature to capture screens with mouse interactions.
- Label your screenshots clearly for easy organization.
- Experiment with different editing tools to enhance your screenshots.
By following these tips, you can improve the quality and effectiveness of your screenshots.
Advanced Techniques
For users who need more advanced techniques, consider using layered annotations or combining multiple screenshots into a single image for better presentation.
Common Issues and Troubleshooting
While the snipping tool is generally reliable, you may encounter issues from time to time. Here are some common problems and solutions:
- Issue: Screenshots are not saving automatically.
Solution: Check your Chromebook settings to ensure the correct save location is selected. - Issue: Editing tools are not working.
Solution: Restart your Chromebook and try again.
If problems persist, consult the official Chromebook support documentation for further assistance.
Seeking Support
If you're unable to resolve an issue with the snipping tool, consider reaching out to Chromebook support or online forums for help.
Conclusion and Next Steps
In conclusion, learning how to use the snipping tool on Chromebook can significantly enhance your productivity and streamline your workflow. By understanding the different types of snapshots, customizing settings, and utilizing editing features, you can capture and share high-quality screenshots with ease.
We encourage you to practice using the snipping tool and explore its various features. Don't forget to share this article with others who may benefit from it, and consider leaving a comment below with your thoughts or questions.
For more tips and tricks on using Chromebook tools, check out our other articles and resources. Happy snapping!